Using AWS IoT as your LoRa backend
This post was originally published on Engineering@TelenorDigital.
Last week during re:Invent, Amazon announced AWS IoT. If you ignore all the fluff on the product page, the service is essentially a message broker. You throw messages over MQTT to Amazon, and you can set up rules to act upon those messages, for example to store the messages in a database. In Telenor Digital we’re working quite a lot with LoRa, Semtech’s wide area network solution, and we figured it would be worth an experiment to see how we can integrate our network with AWS IoT.
Authentication
First step is to make sure that authentication works. Contrary to AWS IoT predecessor ThingFabric, authentication does not happen through username/password, but rather via certificates. It might be safer, and allows you to revoke certificates easily, but not all tools support it (f.e. node-red); or just crash when trying to use certificates (hello MQTT.js). Even worse, Amazon did not get it’s sh*@ straight and is sending the wrong hostname in the certificate, causing tools like mosquitto to have to be called with the --insecure flag (which was not mentioned in the manual).
–insecure, When using certificate based encryption, this option disables verification of the server hostname in the server certificate.
Anyway, before we start writing code, let’s make sure our certificates work.
- Install mosquitto
- Download Amazon root certificate and store as
rootCA.pem - Log into AWS IoT, and go to the certificate tab. Click the ‘1 Click Certificate Create’

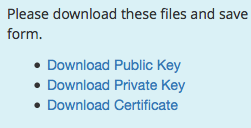
- This gives you 3 files, store them alongside the rootCA file.
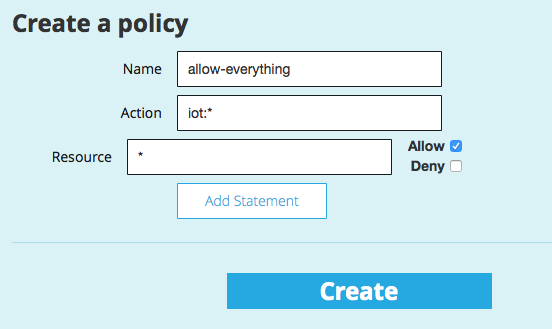
- Create a new Policy which allows you to do everything
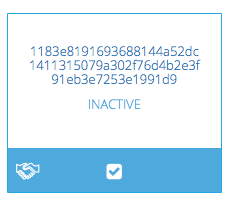
- Select the certificate in the list, and click Actions -> Activate. Certs are inactive by default.
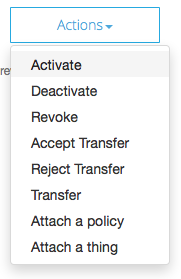
- Select the certificate in the list again, and click Actions -> Attach a Policy.
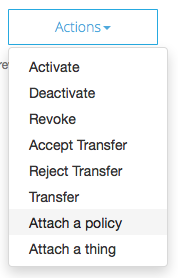
- In the modal dialog, fill in the name of the policy we created earlier (allow-everything).
- Find out the MQTT endpoint. This used to be in the UI, but they removed. Very annoying. To find it, first create a ‘Thing’, then select it and check the details tab, the host name that shows is your endpoint.
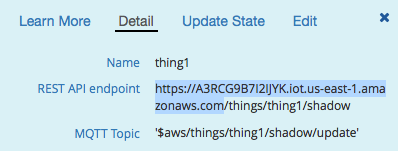
Verifying things work
All these steps feel way too complicated, so if mosquitto doesn’t want to connect, please double check everything. Now it’s time to verify whether our message broker works. Open a terminal, navigate to the directory where you stored the certificates, and start listening on the topic lora/1337.
$ mosquitto_sub --cert 1183e81916-certificate.pem.crt --key 1183e81916-private.pem.key --cafile rootCA.pem --insecure -h A3RCG9B7I2IJYK.iot.us-east-1.amazonaws.com -p 8883 -q 1 -d -t lora/1337Open another terminal, and now publish a message on the same topic.
$ mosquitto_pub --cert 1183e81916-certificate.pem.crt --key 1183e81916-private.pem.key --cafile rootCA.pem --insecure -h A3RCG9B7I2IJYK.iot.us-east-1.amazonaws.com -p 8883 -q 1 -d -t lora/1337 -m "Hello AWS!"If all went well, you should see the following:
Client mosqsub/41751-Jans-MacB sending PINGREQ
Client mosqsub/41751-Jans-MacB received PINGRESP
Client mosqsub/41751-Jans-MacB received PUBLISH (d0, q1, r0, m1, 'lora/1337', ... (9 bytes))
Client mosqsub/41751-Jans-MacB sending PUBACK (Mid: 1)
Hello AWS
From LoRa to AWS
Now that we know that AWS works, we can start pumping the incoming messages on our LoRa network into AWS IoT. On our network side we use Semtech LoRaWAN Server, so if you’re using another platform, your mileage may vary. If we want to act on the data we can create a ‘customer server’, which is a program which listens on a socket that receives JSON messages whenever a device sends data over the network. This sounds like a great place of hacking our AWS middleware. To map from a LoRa device to a MQTT topic we want to use the applicationId and the deviceId, but unfortunately the applicationId is not included in the messages sent to the customer server. So if you want to go further, first apply this patch (the next major version of the server will include this patch).
So let’s write a simple node.js server that listens on a port and forwards the data to AWS (first do npm install mqtt).
var mqtt = require('mqtt');
var fs = require('fs');
var Path = require('path');

var mqttOpts = {
  key: fs.readFileSync(Path.join(__dirname, '1183e81916-private.pem.key')),
  cert: fs.readFileSync(Path.join(__dirname, '1183e81916-certificate.pem.crt')),
  ca: fs.readFileSync(Path.join(__dirname, 'rootCA.pem')),
  protocol: 'mqtts',
  hostname: 'A3RCG9B7I2IJYK.iot.us-east-1.amazonaws.com',
  port: 8883
};

var mqttClient = mqtt.connect(mqttOpts);
mqttClient.on('connect', function() {
  console.log('Connected over MQTT');
});

var net = require('net');
var server = net.createServer(function(socket) {
  console.log('New client connected');

  socket.on('data', function(data) {
    if (data.length === 1 && data[0] === 0x00) {
      return; // some sort of ping?
    }

    // so all messages end with 0x00 so skip that
    var obj = data.toString('utf8', 0, data.length - 1);
    try {
      obj = JSON.parse(obj);
    }
    catch (ex) {
      return console.error('Could not parse message', data,
        data.toString('utf8'), ex);
    }

    if (obj.app && obj.app.dir === 'up') {
      var topic = 'lora/';
      topic += obj.app.appeui;
      topic += '/' + obj.app.moteeui;

      var keyname = 'port' + obj.app.userdata.port + '_bytes';
      var payload = {};
      payload[keyname] = [].slice.call(new Buffer(obj.app.userdata.payload, 'base64'));

      console.log('publishing', topic, payload);

      try {
        mqttClient.publish(topic, JSON.stringify(payload));
      }
      catch (ex) {
        console.error('Publishing to', topic, 'failed', ex);
      }
    }
    else {
      console.log('Unknown message', obj);
    }
  });
});

server.listen(process.argv[2] || 6500, '0.0.0.0', function() {
  console.log('Listening on port', server.address().port);
});
Let’s say that a device with ID 9372163, under application 37817737f13 sends a message [0x01, 0xfe]. Then we publish the message to lora/37817737f13/9372163.
Now we need to tell the Semtech server that our server needs to receive messages as well. Run loracmd (with all services running), and type (need to repeat this for every application ID you have):
as
app server add YOUR-APP-ID 127.0.0.1:6500 active user motetx gwrx joinmonitor
After this incoming messages will be forwarded to our server and from there to AWS IoT.
Storing data in DynamoDB
AWS IoT is ‘just’ a message broker, and does not store historical data. But it also contains a rules engine, and thus we can create a rule which will store the data in a DynamoDB database. First go into the DynamoDB dashboard and create a new table with the following properties.
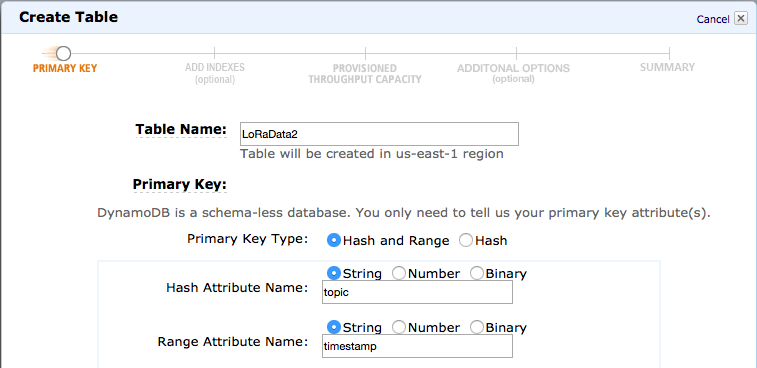
You might realize that timestamp is a string here, which seems weird, but unfortunately due to a bug in AWS IoT, the range key has to be of type string. Annoying.
Creating IAM role and policy
Next, we’ll need to create a IAM role which is allowed to read / write data to this table. Go to IAM, and create a new Role.

On the Role Type, choose ‘Data pipeline’.
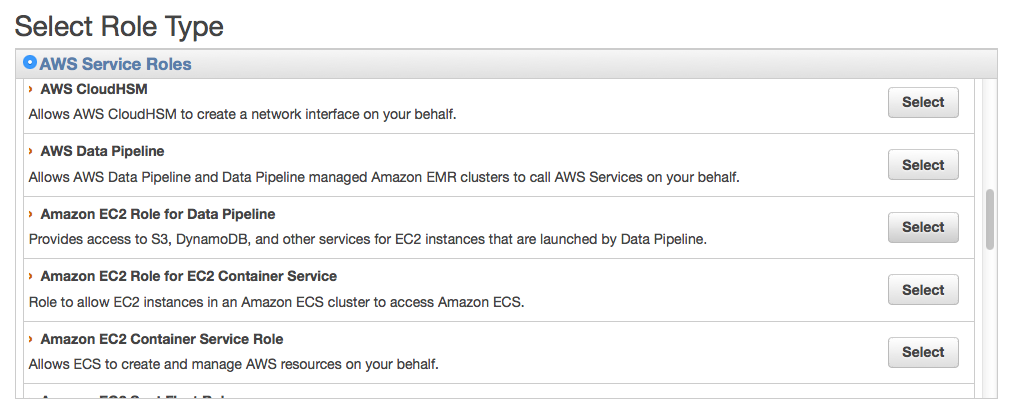
After creating the role, create a new policy with the following policy document (notice the table name).
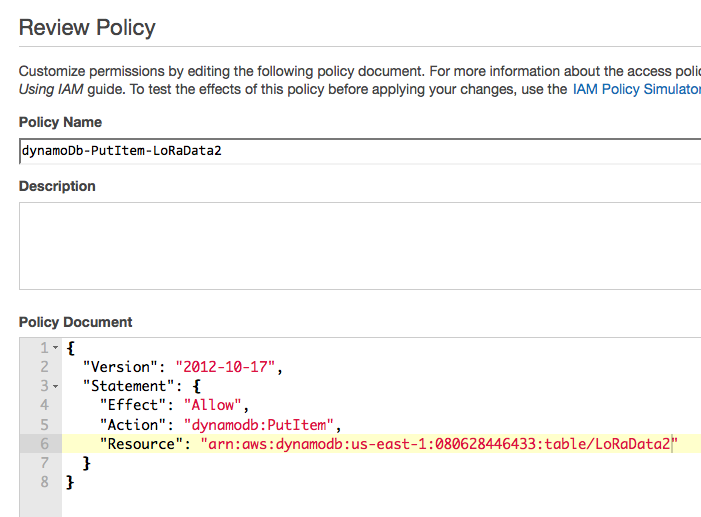
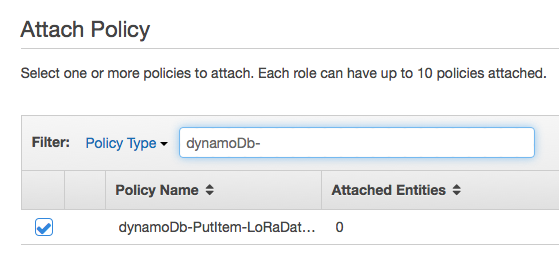
Go back to the Role, and choose to add a new policy, and pick the one we just added.
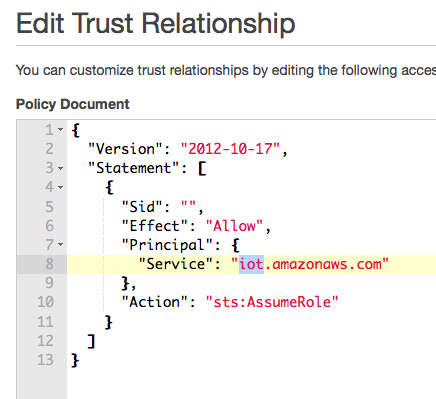
Then change the trust policy and write iot here.
Creating an IoT role
Now go back to AWS IoT and choose to create a new role. We said before that we publish messages under lora/APPID/DEVICEID, so subscribe to all messages under lora/. We then publish to DynamoDB under APPID/DEVICEID.
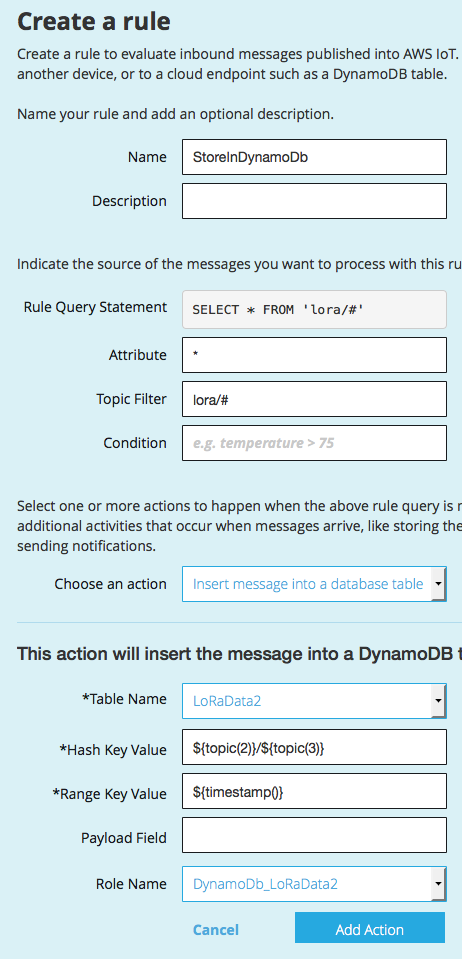
Now after we publish a message it shows up in DynamoDB… Victory!

FYI, the raw_payload is encoded as base64.
Concluding
Now we have all the bits and pieces in place. We use AWS IoT as our MQTT broker and DynamoDB to store our historical data. When we want to consume the data we can take any MQTT library to get events from our sensor, and we can use the AWS SDK to get historical data from DynamoDB. For an example of how to integrate everything in node.js, take a look here.
In general I think that AWS has a nice product, but setting it up is a big PITA, and when something goes wrong you’re basically in the dark, as I couldn’t manage to set up log files either. When everything runs it’s a nice experience, and a great fit for IoT developers, so let’s hope Amazon gets their onboarding experience straight.